Few things are as frustrating as a freshly finished wall developing screw pops three weeks after the painter leaves. The screw did not loosen, and the board did not warp. What failed was the installation. Most drywall defects trace back to four controllable variables:
- Thread type matched to the framing material
- Coating matched to the exposure
- Depth and angle of the driven head
- Spacing and edge distance
Fix those four variables and the most common defects disappear. This guide walks through the practical decisions that matter on site, from screw selection and driver setup to depth control, spacing, and what a correctly seated screw head should look like.
Start with the Right Thread for the Frame
Drywall screws are not universal fasteners. A screw that holds perfectly in a pine stud will tear loose in a light-gauge steel track, and the reverse is also true. The rule is simple: coarse thread for wood studs, fine thread for steel studs. Coarse threads bite deeper into softwood fibers and pull the board tight against the framing. Fine threads engage the thin steel flange of a metal stud without chewing it out, which is why crews working on steel framing should not reach for the same coarse-thread box they use on timber.
A standard coarse-thread fastener such as this black phosphated bugle-head drywall screw is engineered for timber studs and battens:
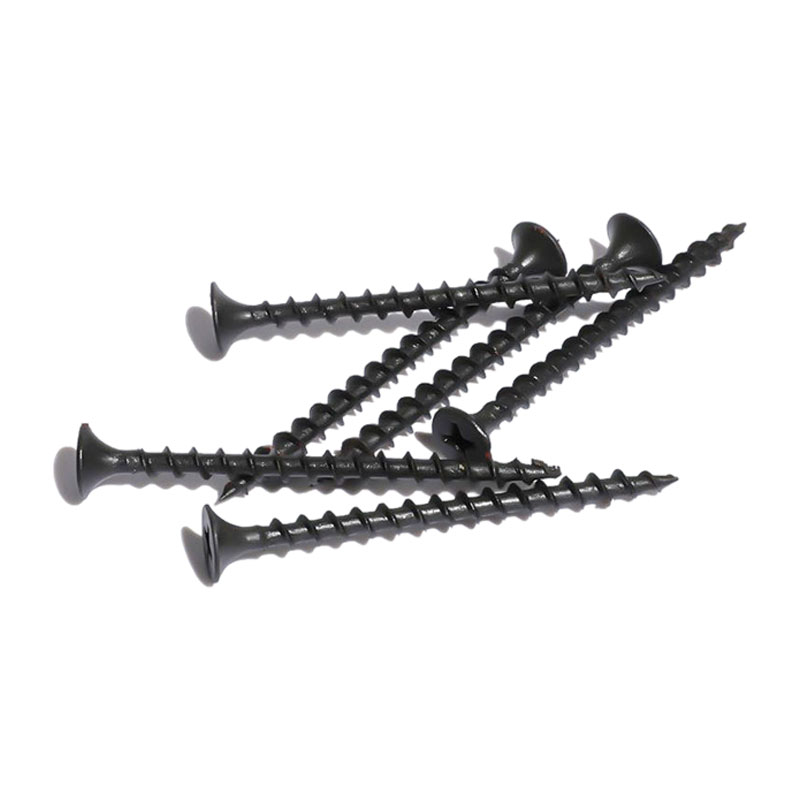 Black Phosphate Coarse Thread Drywall ScrewThis coarse-thread Phillips bugle-head screw is designed for timber studs and battens, as referenced in the surrounding text. Its black phosphate finish suits standard drywall fastening applications.View Product →
On a steel frame, switch to a fine-thread gypsum board screw so the thread picks up the metal flange without overloading the driver:
The same logic applies to the head. The bugle head is designed to create a slight dimple in the board surface without tearing the paper. Its curved underside spreads the load evenly across the face paper, which is why flat pan-head wood screws are a poor substitute on a drywall job.
| Feature | Coarse thread | Fine thread |
|---|---|---|
| Best for | Wood studs, battens, OSB | Light-gauge steel studs |
| Grip in substrate | High pull-out resistance | Clean bite in thin metal |
| Typical point | Sharp needle point | Sharper self-centering point |
| Risk when used on the wrong substrate | Strips the steel flange | Spins out of softwood |
Match the Coating to Exposure, and Set the Depth
Black phosphate is the default for interior drywall because it is clean, slightly rough, and gives the screw a little extra grip as it seats. Gray phosphated and yellow zinc plated finishes add corrosion resistance. If the wall is in a bathroom, a coastal building, or an unheated garage where condensation is likely, upgrade the coating before driving the first screw. Corrosion bleed-through is almost impossible to repair without refinishing the wall.
A yellow zinc plated drywall screw provides noticeably better moisture resistance than standard black phosphate for high-humidity interiors:
Coating also affects driving. Phosphated screws have a matte surface that seats smoothly, while zinc finishes can feel slightly slicker under high clutch settings, so adjust the driver accordingly.
Pro tip: verify depth on a scrap board before every batch. The head should break the face paper and sit about 1 mm (0.04 inch) below the surface, creating a dimple, without tearing the paper ring around the head. Torn paper loses a large share of its holding strength, and the finished joint will show it.
Length, Spacing, and Penetration Fundamentals
Choosing the right length is not about matching the board thickness alone; it is about penetration into the framing. For 12.7 mm (1/2 inch) drywall on timber studs, use 32 mm (1-1/4 inch) screws. For 15.9 mm (5/8 inch) board, use 41 mm (1-5/8 inch) screws. In both cases the screw should penetrate the stud by at least 16 mm (5/8 inch). Shorter screws engage only the paper and the surface layer of the core, which is why they let go under vibration and seasonal movement.
Spacing follows a pattern that board manufacturers and framing specs agree on: closer at the edges, wider in the field. On walls, space screws 203 mm (8 inches) apart along supported edges and 406 mm (16 inches) apart in the field. On ceilings, reduce that to 152 mm (6 inches) on edges and 305 mm (12 inches) in the field. Keep every screw at least 10 mm (3/8 inch) back from the edge and end of the board, or the paper will disintegrate under the head.
| Location | Edge spacing | Field spacing |
|---|---|---|
| Walls with 16-inch stud centers | 203 mm / 8 in | 406 mm / 16 in |
| Ceilings | 152 mm / 6 in | 305 mm / 12 in |
| Minimum edge distance | 10 mm / 3/8 in from the board edge | |
These rules are covered step by step in our drywall screw installation techniques guide, which gives crews a written procedure to follow on site.
Driver Setup and Driving Technique That Protect the Board
Driving a drywall screw is mechanically simple, but technique separates a smooth wall from a patch job. Use a #2 Phillips bit with sharp, unworn wings. A worn bit cams out under torque, strips the head, and leaves screws standing proud. On a production job, change bits regularly, as soon as you notice slipping rather than at a fixed count.
Set the clutch low enough that the drive stops as the head begins to dimple the paper, then finish with a short low-speed burst or a quarter turn by hand. An impact driver works well, but keep the speed low; high RPM drives the screw too deep before you can react, and the hammering action can deform the paper around the head.
Hold the driver perpendicular to the board. A screw driven 10 degrees off perpendicular pulls the board sideways, opens a gap at the joint, and can curl the paper at the edge. When working in confined corners where you are tempted to tilt the tool, use a short extension and keep the same wrist posture as on the open wall.
Pro tip: drivers, springs, and batteries change over the day. For the first screw of every new batch, back off the clutch and confirm the dimple depth on a test board. The test costs 10 seconds and prevents a full sheet of overdriven heads.
Common Installation Defects and How to Prevent Them
Most defects are predictable, which means they are preventable. The table below lists the defects that generate the most callbacks, the usual cause, and the practical fix.
| Defect | Usual cause | Prevention |
|---|---|---|
| Screw pops | Overdriven head, wrong thread, moisture movement | Dimple depth control, correct thread for the stud |
| Torn paper around head | Head driven too deep or angled | Low clutch, perpendicular angle, sharp bit |
| Stripped Phillips head | Worn bit, high speed, poor engagement | Fresh #2 bit, seat the bit fully, low speed |
| Board lifted, head proud | Underdriven screw, bit slipped early | Finish the final turn manually, replace worn bits |
| Edge breaking out | Screw too close to the board edge | Keep at least 10 mm / 3/8 in from the edge |
| Corrosion bleed-through | Wrong coating in a damp area | Use yellow zinc or a higher corrosion-resistant finish |
Screw pops deserve an extra note
A screw pop usually appears weeks after finishing, when wood studs lose moisture and shrink. The screw, held firmly in the board, is pushed outward as the stud contracts. This is exactly why depth control matters: an overdriven screw has already crushed the paper and core around the head, so the pop starts with almost no additional movement. Driving to a true dimple leaves the paper intact and gives the joint compound a solid base to bond to.
Good installation is boring: the same depth, the same angle, the same spacing, board after board. Boring walls do not need touch-ups.
Frequently Asked Questions
Q1: What size drywall screw should I use for 1/2-inch drywall on wood studs?
Use a 32 mm (1-1/4 inch) coarse-thread drywall screw. It provides at least 16 mm (5/8 inch) penetration into the stud. For 5/8-inch board, move up to 41 mm (1-5/8 inch) screws.
Q2: Do I need to pre-drill before driving drywall screws?
No. A standard drywall screw has a sharp needle point that self-centers in gypsum board and starts cleanly into wood or light-gauge steel studs. Pre-drilling is only useful for dense boards such as cement board or for hardwood blocking, where the thread needs help to start.
Q3: Why do my drywall screws keep popping after the wall is painted?
The most common causes are overdriving and a thread mismatch. Confirm that you are using coarse-thread screws in wood and fine-thread screws in steel, and that the head only dimples the paper rather than tearing it. Also inspect the driver bit, because a slipping bit leaves screws high and triggers a second pass that damages the board.
Q4: How far should the screw head sit below the drywall surface?
About 1 mm (0.04 inch) below the surface, creating a dimple, without cutting a groove in the paper. If the paper tears around the head, the screw is too deep; install a fresh screw nearby and patch only the damaged spot.
Installation problems usually trace back to a handful of controllable choices: thread type, coating, depth, spacing, and the condition of the driver bit. Contractors who standardize on one reliable drywall screw gain more than speed; they reduce callbacks, wasted material, and expensive second visits.
For crews and distributors looking for a consistent supply, our drywall screw range covers coarse-thread, fine-thread, and zinc-finished options with documented specifications, so what arrives on site matches what you tested. Consistent geometry, sharp points, and even coating are the quiet foundation of a smooth wall.